I was halfway through a midnight binge of classic horror movies, the lights flickering, the popcorn bowl growing heavier with each passing minute. The kitchen was a chaotic swirl of butter, salt, and a faint, sweet aroma that seemed to seep into the walls. I reached for a bag of ordinary popcorn, only to realize that the flavor was as bland as a plain office chair. That moment, that clumsy, tasteless pop, felt like a betrayal of my own taste buds.
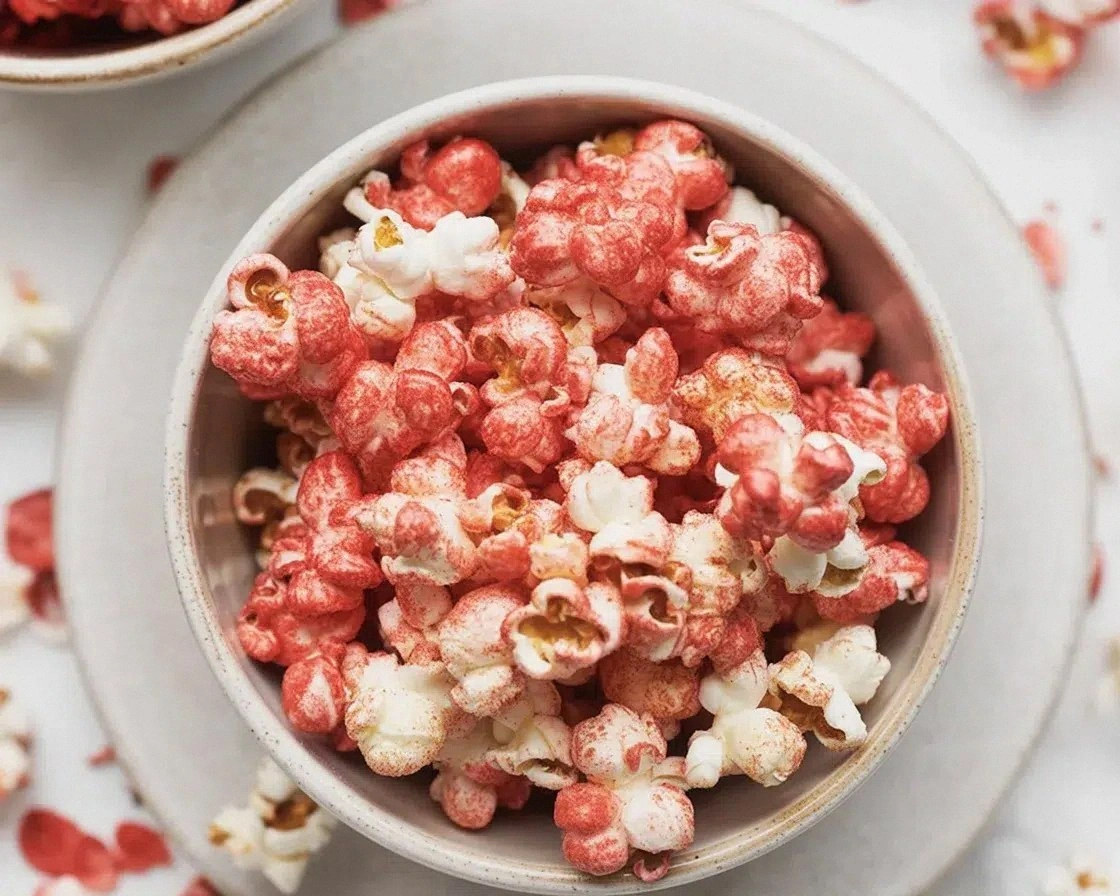
So I decided to rewrite the rulebook. I grabbed a bag of red velvet candy melts, a generous scoop of white chocolate, and a handful of candy eyeballs that I’d saved from a Halloween party last year. I poured the melted chocolate over the popcorn, watching it coat each kernel like a crimson velvet blanket. The sizzling sound as the chocolate hit the hot kernels was music to my ears, a promise that something spectacular was about to happen.
If you’re tired of the same old movie‑night snack, this recipe is a revelation. It turns a simple bowl of popcorn into a gothic masterpiece that looks like a blood‑stained dessert and tastes like a sweet, crunchy, chocolatey dream. The combination of red velvet and white chocolate creates a dramatic color contrast that will make your guests gasp, while the candy eyeballs add a playful, spooky twist that feels like a secret handshake between you and the universe.
Most popcorn recipes you’ll find online are either too sweet or too salty, but this version is a carefully balanced symphony of flavors and textures. The popcorn remains airy and crisp, the chocolate melts into silky ribbons, and the crushed Oreos or black sprinkles add a crunchy, salty finish that cuts through the sweetness. I dare you to taste this and not go back for seconds.
Let me walk you through every single step—by the end, you’ll wonder how you ever made it any other way. The process is deceptively simple, yet the outcome is a showstopper that will dominate your Halloween spread or any casual gathering. Picture yourself pulling this out of the bowl, the whole kitchen smelling incredible, and watching the eyes of your friends light up in delight.
What Makes This Version Stand Out
- Taste: The marriage of rich red velvet candy melts with smooth white chocolate creates a flavor profile that feels both decadent and playful. The sweet, slightly tangy notes of the red chocolate balance the mellow sweetness of the white chocolate, giving each bite a layered experience.
- Texture: The popcorn provides a light, airy crunch that contrasts beautifully with the silky chocolate coating. The crushed Oreo cookies or black sprinkles add a secondary crunch that keeps the snack from becoming a mushy mess.
- Visual Impact: The deep crimson hue of the chocolate, combined with the pale white chocolate ribbons, makes the snack look like a piece of edible art. The candy eyeballs punctuate the bowl, adding a pop of color and a touch of macabre fun.
- Ease: All you need is a microwave, a few bowls, and a handful of ingredients. There’s no need for a stove or fancy equipment—just a quick melt and a gentle stir.
- Make‑Ahead Potential: You can prepare the popcorn and chocolate coating in advance, then store it in an airtight container for up to 48 hours. The flavors will meld beautifully, and the texture will hold up as long as you keep the container dry.
- Party Appeal: The snack is a conversation starter. It’s perfect for Halloween parties, movie nights, or any gathering where you want to impress without spending hours in the kitchen.
Alright, let's break down exactly what goes into this masterpiece. Every component has been chosen to maximize flavor, texture, and visual drama.
Inside the Ingredient List
The Flavor Base
The core of this snack is the popcorn itself. Use a light‑to‑medium popcorn variety that pops cleanly and remains fluffy. If you can’t find fresh popcorn kernels, a pre‑popped bag works, but the texture will be slightly different. The popcorn provides the airy foundation that absorbs the chocolate without becoming soggy.
The Texture Crew
The crushed Oreo cookies or black sprinkles bring a second layer of crunch. They also add a subtle hint of vanilla or chocolate, depending on which you choose. If you prefer a sweeter finish, go with Oreos; for a darker, more decadent look, black sprinkles are the way to go. Remember, the key is to crush them finely—too large and they’ll clump, too fine and they’ll blend into the chocolate.
The Unexpected Star
Candy eyeballs are the pièce de résistance. They’re not just for show—they add a burst of sugary crunch and a touch of whimsy. If you can’t find them, small gummy candies in red or white will do, but they won’t have the same visual impact. The eyeballs are a nod to classic horror tropes and give the snack a playful, spooky vibe.
The Final Flourish
The white chocolate ribbons are the finishing touch that ties everything together. They soften the intensity of the red chocolate and create a contrast that’s pleasing to the eye. Melt the white chocolate until it’s glossy, then drizzle it over the popcorn in a gentle stream. The white chocolate will pool in the crevices, creating a decadent, melt‑in‑your‑mouth texture.
Everything's prepped? Good. Let's get into the real action.
The Method — Step by Step
- Step 1: Pop the popcorn. Heat a large pot over medium heat, add a splash of oil, and toss in the kernels. Cover and shake occasionally until the popping slows to one pop every few seconds. The popcorn should be light and fluffy, not browned. Set aside and let it cool slightly; you don’t want it steaming when you add chocolate.
- Step 2: Prepare the chocolate. Place the red velvet candy melts in a microwave‑safe bowl. Microwave on 30-second intervals, stirring between each, until completely melted and smooth. Do the same with the white chocolate, but use a lower power setting to avoid scorching. The chocolate should be glossy and pourable.
- Step 3: Coat the popcorn. Pour the melted red velvet chocolate over the popcorn in a large mixing bowl. Use a spatula or a large spoon to stir until every kernel is coated. The chocolate should cling to the popcorn without pooling. If you see any clumps, add a splash of milk to thin the mixture slightly.
- Step 4: Add the crunch. Sprinkle the crushed Oreo cookies or black sprinkles over the chocolate‑coated popcorn. Toss gently to distribute the crumbs evenly. The crunch should be audible when you bite, providing a satisfying counterpoint to the silky chocolate.
- Step 5: Secure the candy eyeballs. Drop the candy eyeballs onto the popcorn, spacing them out so each one is visible. The eyeballs should sit on top of the chocolate, not buried underneath. If you’re using a large bowl, you can layer the popcorn and eyeballs in alternating layers for a more dramatic look.
- Step 6: Drizzle the white chocolate. Slowly pour the melted white chocolate over the popcorn in a steady stream. The white chocolate should pool in the gaps, creating a glossy finish. Use a spoon or a squeeze bottle for a more controlled drizzle. The white chocolate will add a subtle sweetness that balances the richness of the red chocolate.
- Step 7: Set the popcorn. Spread the popcorn onto a parchment‑lined baking sheet and let it sit at room temperature for 10 minutes. The chocolate will harden slightly, making the popcorn easier to scoop and eat. This resting period also allows the flavors to meld together.
- Step 8: Serve and enjoy. Transfer the popcorn to a decorative bowl or individual cups. Serve immediately for the best texture, or store in an airtight container for up to 48 hours. The popcorn remains crisp, and the chocolate stays glossy.
That’s it—you did it. But hold on, I’ve got a few more tricks that will take this to another level. These insider tips will help you perfect the texture, enhance the flavor, and make the snack truly unforgettable.
Insider Tricks for Flawless Results
The Temperature Rule Nobody Follows
Chocolate is a fickle friend; it can go from glossy to gritty in a heartbeat if not handled correctly. The secret is to keep the chocolate at a low, steady temperature—ideally around 80°F for dark and 85°F for white chocolate. Use a chocolate thermometer or a simple test: place a small drop on a cold plate; if it firms quickly, you’re good.
Why Your Nose Knows Best
When the chocolate hits the popcorn, it should emit a warm, sweet scent that fills the kitchen. If the aroma is weak or metallic, the chocolate has likely overheated. Trust your nose—if it doesn’t smell like cocoa, it’s time to cool the chocolate down.
The 5-Minute Rest That Changes Everything
After coating the popcorn, let it rest for exactly five minutes before adding the white chocolate drizzle. This brief pause allows the chocolate to set just enough to hold the popcorn together, preventing the popcorn from sticking together in clumps.
The Right Bowl Matters
Use a wide, shallow bowl for coating. A deep bowl forces the popcorn to pile up, which can trap uncoated kernels and make the chocolate unevenly distributed. A shallow bowl also makes it easier to stir and ensures a more uniform coating.
The Final Finish
Before serving, give the popcorn a quick shake in a zip‑lock bag. This redistributes the chocolate and ensures each bite has a balanced mix of flavors. It also adds a fun, interactive element to the presentation.
Creative Twists and Variations
This recipe is a playground. Here are some of my favorite ways to switch things up:
Spicy Sin
Add a pinch of cayenne pepper to the red velvet chocolate before coating. The heat will contrast the sweetness and give the popcorn a surprising kick that’s perfect for adventurous palates.
Nutty Horror
Replace the crushed Oreo cookies with chopped pecans or walnuts. The nutty flavor pairs wonderfully with the chocolate, and the crunch adds a new dimension to the texture.
Citrus Blood
Squeeze a few drops of orange zest into the white chocolate drizzle. The citrus notes cut through the richness and add a fresh, zesty aroma.
Minty Mystery
Stir a teaspoon of peppermint extract into the white chocolate before drizzling. The mint flavor creates a subtle, cooling aftertaste that’s a delightful surprise.
Gourmet Gaze
Swap the candy eyeballs for real chocolate truffles or small chocolate spheres. The truffles add an upscale touch while still maintaining the spooky aesthetic.
Storing and Bringing It Back to Life
Fridge Storage
Place the popcorn in an airtight container and store it in the refrigerator for up to 72 hours. The cool temperature will keep the chocolate firm, but be sure to let it come to room temperature before serving to regain the glossy finish.
Freezer Friendly
For longer storage, wrap the popcorn tightly in plastic wrap and freeze. It will stay crisp for up to 2 weeks. Thaw in a sealed bag at room temperature for a few hours before serving.
Best Reheating Method
If the popcorn has become a little stale, place it in a preheated oven at 300°F for 5 minutes. Add a splash of water to the bowl before reheating; the steam will revive the crispness without melting the chocolate.