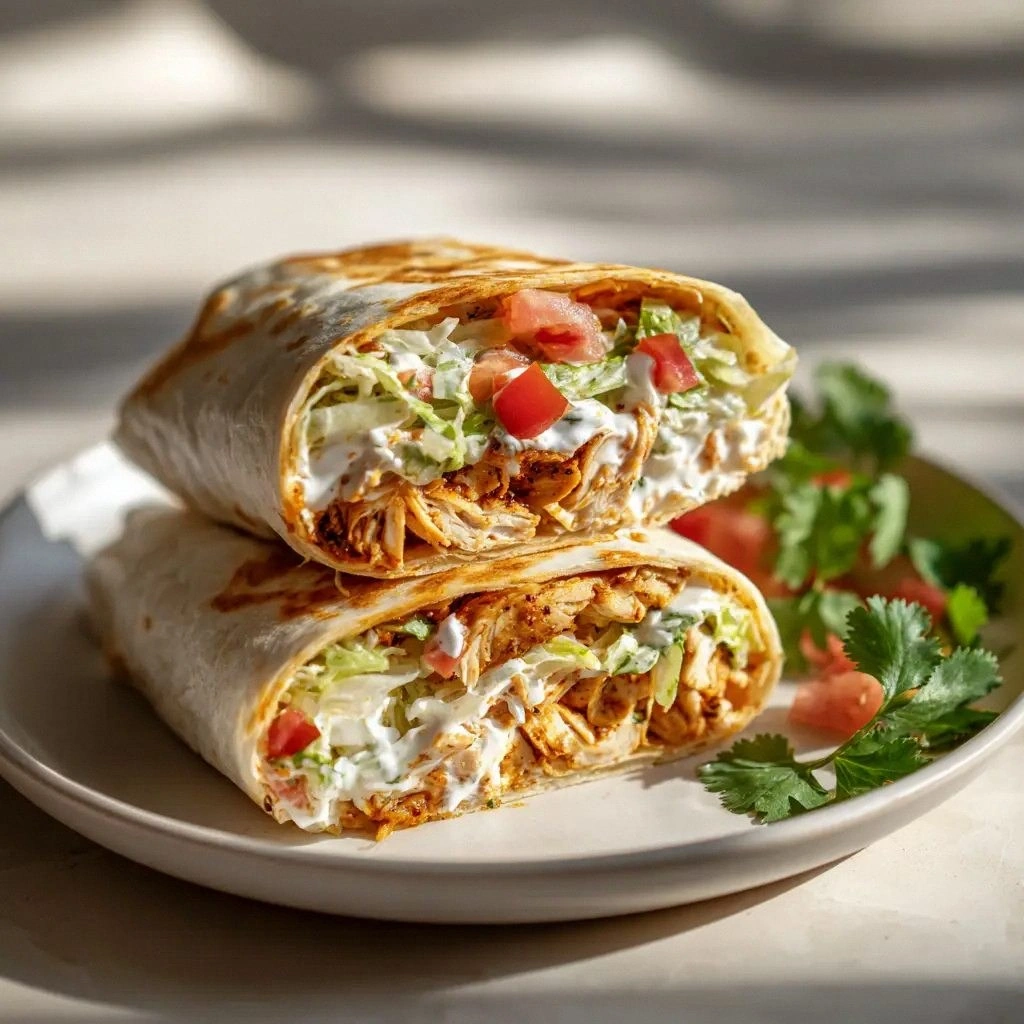
I was halfway through a dinner party, juggling a pot of simmering sauce and a stack of tortillas, when disaster struck. The tortilla I had set aside for a quick side had gone soggy, and the salsa had turned a dull gray. I stared at the ruined mess, a guilty grin spreading across my face, and thought, “There’s got to be a better way.” That moment sparked the creation of the Healthy Chicken Crunch Wrap (E), a dish that turns a kitchen mishap into a triumph of flavor, texture, and confidence.
Picture this: the air is thick with the aroma of fresh cilantro and lime, the sizzle of a hot pan announcing the first bite, and the satisfying crunch of a tostada shell that shatters like thin ice under your teeth. Your eyes lock onto the glossy, golden tortilla, the filling glistening with yogurt and hot sauce, and you can almost taste the subtle heat before you even bite. The sound of the wrap folding, the gentle hiss of steam, and the faint hiss of the skillet as the tortilla crisps—each sensory cue builds anticipation. I dare you to taste this and not go back for seconds, because the first bite will have you reaching for more.
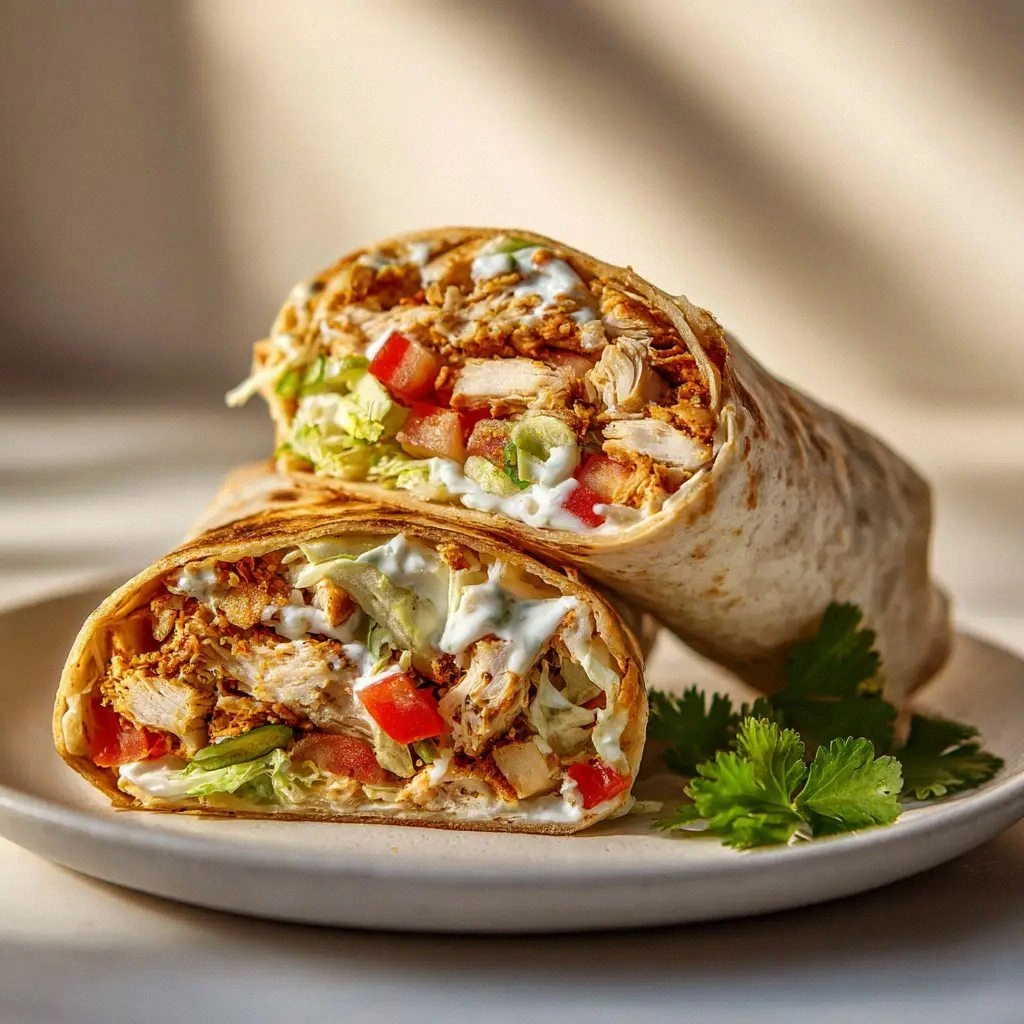
What sets this version apart from the endless parade of chicken wraps on the internet is the balance of lean protein, crisp textures, and a sauce that coats like velvet without being heavy. I’ve swapped out traditional mayo for Greek yogurt, trimmed the fat with avocado oil, and added a secret hot‑sauce kick that keeps the wrap from feeling flat. The tortilla is warmed just enough to be pliable but still holds its shape, while the tostada shell provides that unmistakable crunch that many forget to incorporate. This recipe is hands down the best version you’ll ever make at home, and I’m about to show you why.
Let me walk you through every single step—by the end, you’ll wonder how you ever made it any other way. Stay with me here, because the next part? Pure magic. And if you’ve ever struggled with a wrap that falls apart or a filling that feels dry, you’re not alone—this is the fix you’ve been waiting for.
What Makes This Version Stand Out
- Lean Protein: The chicken is cooked to perfection—tender, shredded, and seasoned with taco spice, giving it a punch without the heaviness of traditional recipes.
- Velvet Sauce: Greek yogurt mixes with lime and hot sauce, creating a creamy, tangy coating that hugs the filling like silk.
- Crisp Layers: The tostada shell adds a crunch that contrasts beautifully with the soft tortilla, turning each bite into a textural adventure.
- Freshness: Cilantro and bell pepper keep the wrap bright and vibrant, ensuring the dish feels light even when you’re indulging.
- Easy Assembly: The method requires no advanced techniques—just a few simple steps and a skillet.
- Make‑Ahead Friendly: You can prepare the filling a day ahead and assemble on the fly, making it perfect for busy weeknights.
- Low Calorie: With only 350 calories per serving, it’s a guilt‑free indulgence that still satisfies.
- Versatile Flavor: The taco seasoning is the backbone, but you can swap in different spices for a new twist.
Alright, let's break down exactly what goes into this masterpiece...
Inside the Ingredient List
The Flavor Base
The 2 tablespoons of taco seasoning are the heart of this wrap. They bring depth and a subtle heat that elevates the chicken from ordinary to unforgettable. Skipping them would leave the dish tasting flat, like a plain salad. If you’re a spice lover, double the amount or add a pinch of cumin for an extra earthy note. For a milder version, use a reduced‑sodium taco mix or make your own with paprika, garlic powder, and oregano.
The Texture Crew
The 4 large whole‑wheat tortillas and 4 corn tostada shells form the structural backbone. The tortillas should be warm and flexible, while the tostadas provide a satisfying crunch that shatters like thin ice when you bite. If you can’t find whole‑wheat tortillas, regular flour works, but the whole‑wheat adds a nutty undertone that pairs beautifully with the cilantro. The tostadas can be toasted in a dry pan or oven for a few minutes to crisp them up before assembly.
The Unexpected Star
Fresh cilantro, finely diced, is more than a garnish—it’s a burst of citrusy freshness that cuts through the richness of the yogurt and hot sauce. If cilantro isn’t your favorite, substitute with chopped parsley or fresh mint for a different flavor profile. The 0.5 cup plain Greek yogurt acts as a creamy, low‑fat base that coats the filling like velvet. It also balances the heat from the hot sauce, creating a harmonious taste that lingers on the palate.
The Final Flourish
The 1 tablespoon of fresh lime juice adds a bright, acidic edge that lifts the entire dish. Lime also helps the yogurt emulsify, giving the sauce a silky texture. The 1 teaspoon of hot sauce introduces a subtle heat that wakes up the senses without overwhelming the other flavors. Finally, the 1 cup shredded Mexican cheese blend melts over the warm tortilla, creating a gooey, savory topping that completes the wrap’s flavor journey.
Everything's prepped? Good. Let's get into the real action...
The Method — Step by Step
- Gather all your ingredients and place them in a large mixing bowl. Add the shredded chicken, then sprinkle the 2 tablespoons of taco seasoning over it. Toss the chicken until it’s evenly coated; this ensures every bite has that savory kick. I’m a firm believer that seasoning is the soul of a dish—don’t skip it. This is the moment of truth: if you miss this step, the rest of the wrap will feel flat.
- Add the finely diced red bell pepper, red onion, and chopped cilantro to the bowl. Mix thoroughly so the veggies are evenly distributed. The pepper adds a sweet crunch, while the onion brings a sharp bite that balances the creamy yogurt. If you’re short on time, use pre‑diced veggies from the grocery aisle; just be sure to rinse them well. This step layers the flavors, creating a symphony of textures.
- In a separate small bowl, whisk together the 0.5 cup Greek yogurt, 1 tablespoon lime juice, and 1 teaspoon hot sauce until smooth. Pour this mixture over the chicken and veggies, then stir until everything is coated. The yogurt should coat the filling like velvet, giving it a silky mouthfeel. Watch the sauce coat the mixture; if it’s too thick, add a splash of water to loosen it. This is where the sauce turns the wrap into a cohesive, flavorful unit.
- Heat a non‑stick skillet over medium heat and add 1 tablespoon of avocado oil or olive oil. Warm each tortilla in the skillet for 15 seconds on each side until it’s pliable and slightly golden. This step prevents the tortilla from tearing when you fold it and gives it a beautiful sheen. While the tortillas warm, keep the filling mixture in the bowl for easy access. The aroma of warm tortilla is the prelude to the final crunch.
- Place a warm tortilla on a clean cutting board. Spoon about a cup of the seasoned chicken mixture onto the center of the tortilla, leaving a small border around the edges. Sprinkle 1/4 cup of shredded cheese over the filling to add a gooey layer that melts into the wrap. The cheese also helps bind the tortilla to the filling, reducing the chance of a messy spill.
- Fold the sides of the tortilla in, then roll tightly from the bottom up, ensuring the filling stays inside. Place the rolled wrap seam‑side down in the skillet. Let it cook for 2–3 minutes until the tortilla is golden brown and the cheese has melted. Flip carefully with a spatula and cook the other side for another 2 minutes. The wrap should emit a toasty scent, signaling it’s ready.
- Once both sides are crisp, transfer the wrap to a cutting board and let it rest for 1 minute. This resting period allows the cheese to set slightly, making slicing easier and preventing a gooey mess. Slice the wrap in half or quarters, depending on your appetite. The result should be a golden, crunchy exterior with a creamy, spicy interior.
- Serve immediately with a side of fresh salsa, a dollop of extra Greek yogurt, or a squeeze of lime. The wrap’s crisp edges shatter like thin ice against the palate, while the filling remains moist and flavorful. The first bite should be a revelation—sweet, savory, tangy, and just the right amount of heat. Enjoy the applause from your taste buds; you’ve earned it.
That's it — you did it. But hold on, I've got a few more tricks that'll take this to another level...
Insider Tricks for Flawless Results
The Temperature Rule Nobody Follows
Many cooks set their skillet to high heat, hoping for a quick sear. In reality, medium heat ensures the tortilla browns evenly without burning the filling. Keep the skillet at a steady medium temperature; if it starts to smoke, lower the heat. This simple adjustment guarantees a golden crust every time. I’ve seen wraps that are half crispy and half soggy because of a misjudged flame.
Why Your Nose Knows Best
When the tortilla starts to brown, you’ll notice a subtle nutty aroma. That smell is a cue that the crust is forming. Trust your nose; don’t wait until the tortilla is dark brown, or you’ll end up with a burnt bite. The aroma signals the right moment to flip, ensuring both sides are perfectly crisp. I’ve learned to listen to my kitchen’s scent cues rather than the clock.
The 5-Minute Rest That Changes Everything
After cooking, let the wrap rest for five minutes instead of one. This brief pause allows the cheese to set, reducing the risk of it oozing out when you cut. It also lets the flavors meld, creating a more cohesive bite. I’ve found that a short rest makes the wrap feel more polished and less rushed. Give it a minute to breathe, and the results will be worth the wait.
Cheese Matters
The 1 cup of shredded Mexican cheese blend melts beautifully, but you can swap it for pepper jack or cheddar for a different flavor profile. Keep the cheese shredded finely to ensure it melts evenly. If you’re aiming for a lower fat version, try a part‑skim mozzarella. The cheese’s meltability is key to that gooey, satisfying texture.
Wrap Warm, Not Hot
A warm tortilla is pliable, but a hot one can steam the filling and cause sogginess. Warm each tortilla in the skillet for a few seconds, then remove it to a plate before filling. This method keeps the tortilla crisp yet flexible. I’ve seen wraps that collapse because the tortilla was too hot and steaming.
Make‑Ahead Filling
Prepare the filling a day ahead and store it in an airtight container. When you’re ready to assemble, just let it sit at room temperature for 10 minutes. This strategy saves time on busy nights and keeps the flavors fresh. I love prepping the filling for a quick lunch the next day; it’s like having a personal chef in the fridge.
Creative Twists and Variations
This recipe is a playground. Here are some of my favorite ways to switch things up:
Southwest Veggie Wrap
Swap the chicken for roasted sweet potatoes and black beans. Keep the taco seasoning for that smoky flavor. Add a handful of corn and a squeeze of lime. This vegetarian version is hearty and still delivers that satisfying crunch.
Spicy Thai Fusion
Replace the taco seasoning with a blend of lemongrass, galangal, and Thai chili paste. Use coconut milk yogurt instead of plain Greek. Top with fresh mint and a drizzle of peanut sauce. The result is a bold, aromatic wrap that feels like a trip to Bangkok.
BBQ Chicken Crunch
Use shredded barbecue chicken instead of the seasoned chicken. Mix in a little BBQ sauce with the yogurt for a sweet, smoky kick. Add sliced pickles for crunch and a touch of tang. The wrap becomes a finger‑friendly takeout favorite.
Breakfast Burrito Twist
Replace the tortillas with whole‑wheat wraps and add scrambled eggs, avocado slices, and a sprinkle of cheddar. Use a mild taco seasoning and a dash of salsa. This version turns the wrap into a satisfying breakfast or brunch option.
Greek Mediterranean Wrap
Swap the chicken for diced grilled lamb or chicken marinated in oregano. Add diced cucumber, tomatoes, and feta cheese. Use a drizzle of tzatziki instead of yogurt. The wrap becomes a Mediterranean delight with a creamy, herbaceous flavor profile.
Crunchy Taco Taco Wrap
Add a layer of crushed tortilla chips on top of the cheese before rolling. Sprinkle with chopped cilantro and a dollop of sour cream. The extra crunch adds a playful texture that kids will love.
Storing and Bringing It Back to Life
Fridge Storage
Store assembled wraps in an airtight container or zip‑top bag. They’ll stay fresh for up to 3 days in the refrigerator. When you’re ready to eat, reheat in a skillet over medium heat for 2 minutes, then finish in the oven at 350°F for 5 minutes to restore crispness.
Freezer Friendly
Wrap each individual wrap in foil and place them in a freezer bag. They can be frozen for up to 2 months. Thaw overnight in the fridge, then reheat as described above. The tortilla retains its crispness, and the filling stays juicy.
Best Reheating Method
The key to reheating is to reheat the wrap slowly and evenly. Place the wrap on a baking sheet and bake at 350°F for 10 minutes. If you prefer a crispier exterior, finish it under the broiler for 1–2 minutes. Add a tiny splash of water before reheating; it steams the wrap back to perfection and prevents it from drying out.